MHServerEmu Progress Report: November 2025
MHServerEmu Progress Report? At this time of year, at this time of day, in this part of the country, localized entirely within your web browser? Yes!
Adding G
Last month we left off with a shiny new web frontend implementation being done, which unlocked the possibility to work on some long overdue store features.
One of the most frequent questions players used to ask was “How do I get more G?”. Using a chat command for essential game functionality was just too counterintuitive for many people, so I knew for a long time we had to get the “Add G” window working. However, it was a lot more work than it may appeared to be, so it just kept being pushed back until this month.
Fun fact: according to the game’s code, G stands for “Gazillionite”.
The “Add G” window you open by pressing a button in the store interface is actually a web browser. Here is how it works:
-
When you begin logging into the game, your client sends login credentials, such as the email and the password you entered, to the server. Assuming you provided valid credentials, the client receives an
AuthTicketin response, which contains the information needed to proceed. Included in thisAuthTicketis a string field namedplatformTicket. -
When you open the “Add G” window, the client sends an HTTP POST request to the URL specified in the store catalog. The request’s body contains the player’s email, the
platformTicketthat was received from the server during login, and the current downloader configuration (Gazillion launcher or Steam). -
The HTTP server that processes the request authenticates the user using the email and the
platformTicket. In response it sends an HTML page that is displayed by the client using the web browser embedded in the “Add G” window. -
The HTML page received in response contains an input form for entering the amount of G the user wants acquire and any other required information (i.e. your payment information in Gazillion’s original implementation).
-
Another request containing this additional user input is sent to the server, which is then processed to modify the amount of G the user has. If this request is successful, the client queries the updated G balance from the server.
In order to implement this whole dance, a number of technical challenges needed to be solved:
-
We needed a robust HTTP server implementation that could handle POST requests from clients, as well as a way to generate and verify
platformTicketinstances for all sessions. -
We needed to make a web-based input form that would be sent in response to client requests. The game uses a version of the Chromium Embedded Framework (CEF) from 2014 as its browser, so the form needed to be made with this version’s limitations in mind. For example, most JavaScript ES6 features cannot be used.
-
We needed to implement effectively a fake billing system that would use game instances as a quasi payment processor to subtract Eternity Splinters and add G.
Here is what the result looks like:
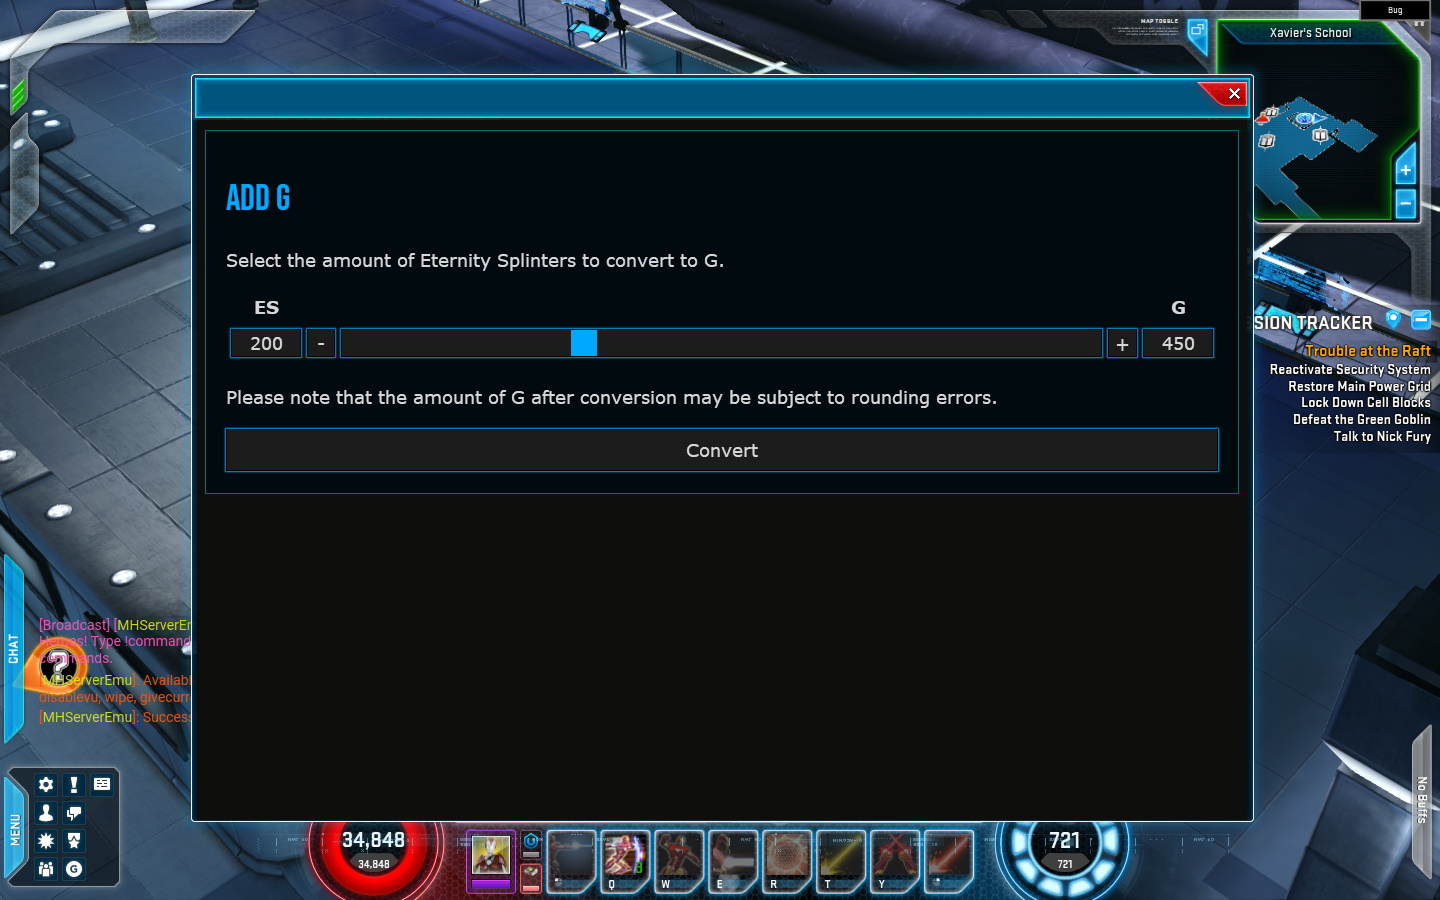
I tried to make the user experience decent, so the implementation ended up being more involved than I expected. For example, to take the current Eternity Splinter balance into account, we needed a way to query it from the game instance the player was currently in, and this was not a feature of Gazillion’s original implementation. Another small issue that needed to be solved was minimizing the effect of rounding errors caused by the configurable conversion ratio. I ended up adding a new server configuration setting that can be used to set a conversion step that would always result in an integer value (e.g. for the default conversion ratio of 2.25 the step is set to 4).
Gifting
Adding G is not the only thing I have in store for you. To reach our goal of feature parity with original Gazillion servers, we needed to do something about the store gifting functionality.
With real money out of the equation, store gifting effectively turns into another in-game trading system, and some things no longer make as much sense as they used to. For example, unlocking gift purchases originally required the account to exist for at least 7 days, have 5 days worth of login rewards acquired, and have a hero of at least level 20. These restrictions were most likely designed with throttling potential fraudulent activities in mind. Unfortunately, with our Eternity Splinter to G conversion feature and accounts having a non-zero starting G balance, the most efficient way of acquiring store items would be to make a whole bunch of alt accounts and use them to gift everything to your main account. Because of this, we needed some additional restrictions. Here is what we ended up this:
-
All the original restrictions are working and can be set to arbitrary values (e.g. the minimum hero level can be set to 60).
-
There are now additional server configuration settings for restricting access to gifting based on the total accumulated Omega or Infinity level. These can be set by server administrators to their preferred values to require a more significant time investment to unlock gifting. This restriction is disabled by default.
-
Gifting is now possible only in a synchronous way. In other words, both the sender and the recipient need to be logged in at the same time and be in proximity of each other in-game, just like they would be with regular trading. Truth be told, this was just the more straightforward way of implementing gift purchases, and the minor additional friction it causes for players abusing the system is more of a side effect.
With this feature done as well, there was only one last piece of the store puzzle left.
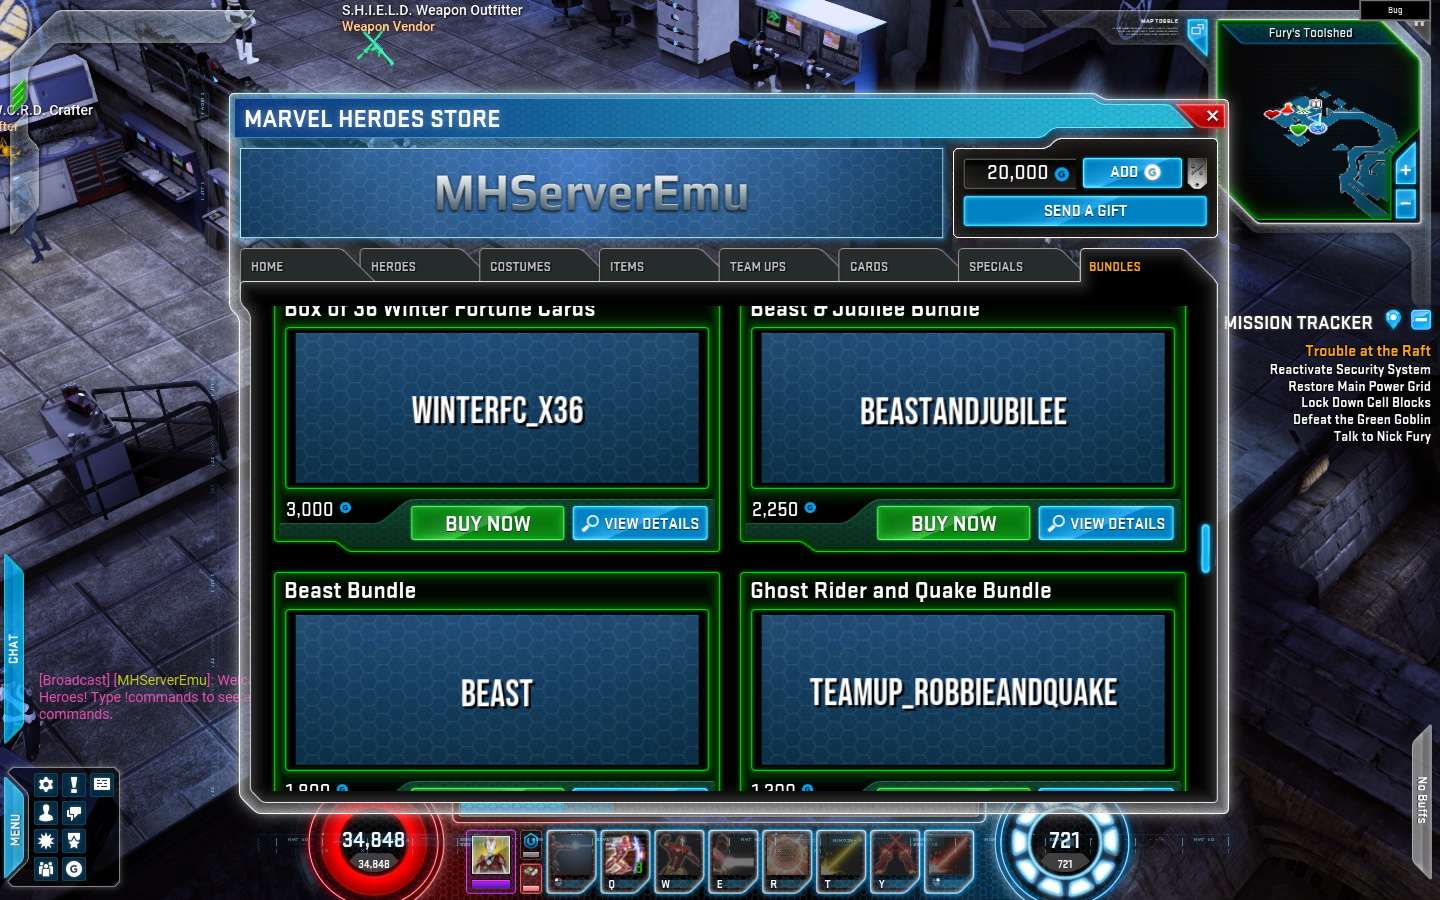
Bundles
The “Bundles” tab of the store had been in a broken state for a long time. The main problem with it was that our data was incomplete. While we had base catalog data for each bundle that came from a packet capture, there were also supposed to be thumbnail images and details that were loaded on demand from the game’s official website, and they were not archived. The catalog data was also incomplete: while it listed the items contained in each bundle, it didn’t specify exact quantities of each item. To make this feature work again, the missing data needed to be restored or recreated for all 125 bundles defined in the catalog.
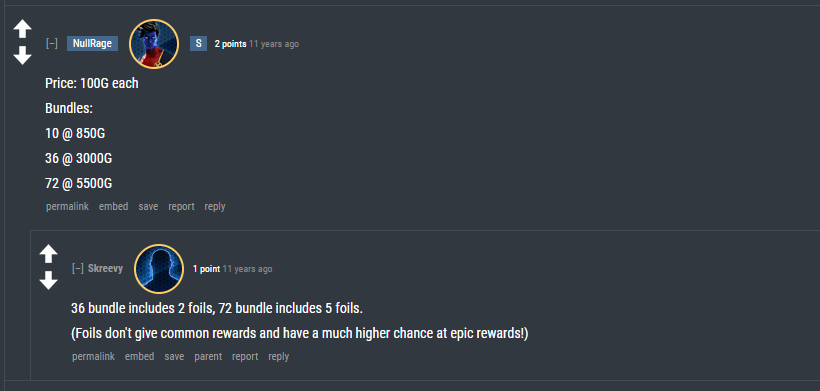
The easiest issue to solve was item quantity values. In many cases the quantity was obvious from bundle names: if a bundle is called “10x Experience Boost Bundle”, then the quantity most certainly has to be 10. Some of them were a bit more tricky: for instance, “Box of 36 Uncanny Fortune Cards” contains a certain number of “foil” cards with supposedly improved drop rates, and the exact quantity of “foil” cards could not be determined from the name alone. In this particular case my source was a comment to a Reddit post from a decade ago when these cards were originally released:
There may still be some quantity values that slipped through the cracks, but all the worst offenders were dealt with.
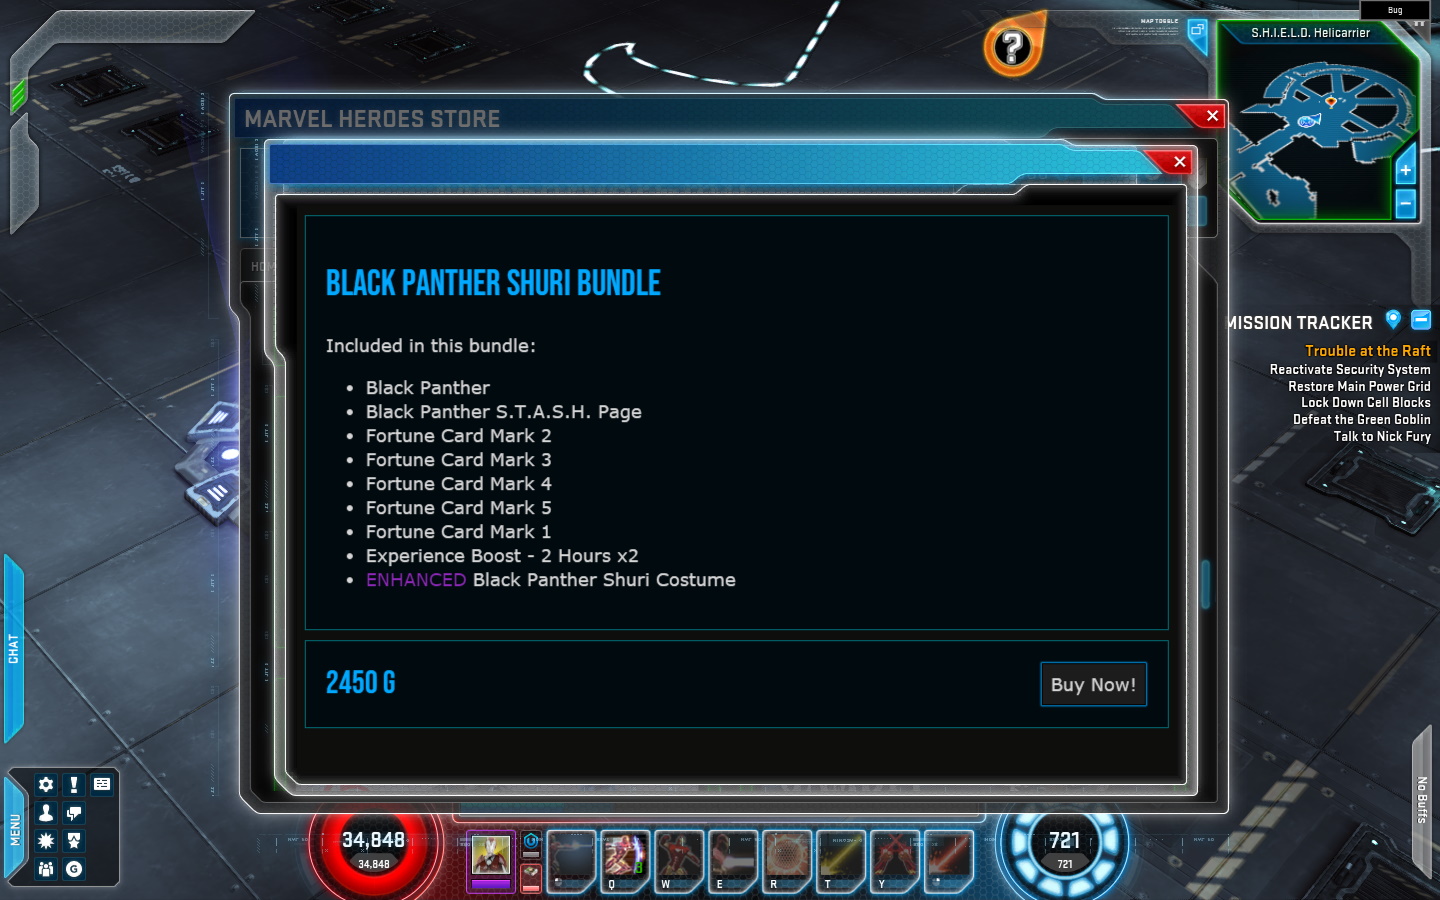
Bundle details were HTML pages with descriptions of bundles, which included information like included items. While the original pages were lost when the game was shut down, we had enough information in our newly restored catalog data to generate replacements. I wrote a Python script that goes through the catalog data, looks up proper names for everything from game data, and generates HTML pages containing the most important information for all bundles. Here is what it ended up looking like:
My original plan for thumbnail images was to generate placeholders based on original file names from the catalog data using the same Python script. This was the result:
While they are not very pretty, at least they are better than lifeless black void. I considered these generated thumbnails to be good enough, but then my partner in crime AlexBond suggested that we can try recovering the thumbnails from old videos on YouTube and cleaning them up with AI upscaling.
At first I wrote the idea off as being too time-consuming and not worth the effort. But then I did some testing with only a few images. Just using screenshots from decent videos was not half bad on its own. I followed this by trying various options for upscaling. Our main challenge was that our source images were text heavy, while also being low resolution and containing video compression artifacts. This resulted in very noticeable text upscaling artifacts you frequently see from AI. I ended up settling on an open-source tool called Upscayl, with its Upscayl Lite model producing the best result in terms of improving the source image in a meaningful way while introducing minimal artifacting.
Results range from “decent enough” to “actually pretty good”. Here is an example of what I consider to be a good quality video source:

And here it is upscaled:

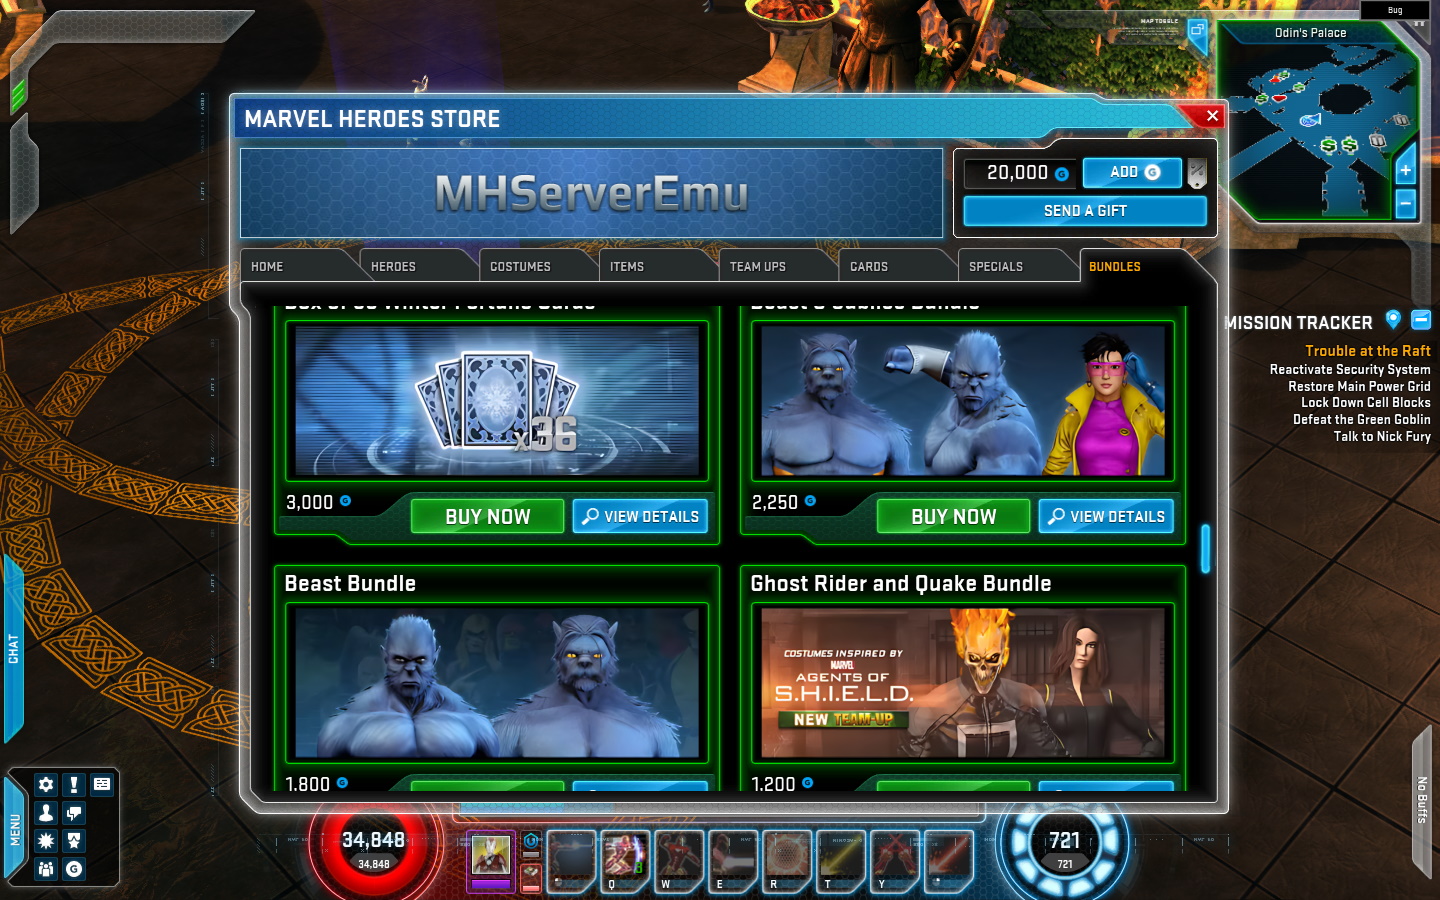
This is what it looks like in-game alongside other upscaled thumbnails:
You may be wondering if upscaling is even worth it for small thumbnails, and the answer is yes. The client imports these images as Unreal textures, and this process requires both the horizontal and the vertical resolution of the thumbnail to be a multiple of 4. The “native” resolution for these thumbnails with UI scaling disabled is 344x128, but because they are rendered as textures, they actually take advantage of the higher resolution when UI scaling is enabled. With UI scaling set to Medium when playing in 1080p by default, which is what many of our video sources use, we get resolution of roughly 406x151. These are not multiples of 4, so we need to scale it either down or up for it to be usable by the game. Scaling down results in losing some of the extra detail from the source, so in order to get the best quality, I needed to scale them up x2, and then scale them down to 688x256, which is double the lowest “native” resolution.
What was originally planned to be done in a day turned into an almost week long scavenger hunt, as I meticulously scrubbed through old videos, looking for the best quality sources possible. In the end I was able to restore the original thumbnails for all 125 bundles we have in our catalog data, as well as 51 more bundles that were fully removed, such as bundles for Fantastic Four heroes and old boosts. Shout out to Wilfrid Wong, MandoAllDay, JayShockblast, Furrek, and Blasar Gaming: your content was instrumental in recovering these old assets. Videos of opening bundles of fortune cards were particularly useful for this.
Just to stay on the safer side, stable releases of MHServerEmu will come bundled (see what I did there) with boring generated thumbnails. The recovered thumbnails are now being shared on our Discord server, and we are looking into making them accessible in other ways without creating minor, but at the same time completely unnecessary risks for the main server repository.
And with bundles back in action, the store has now been fully restored to its former glory.
Steam Deck Improvements
After getting side tracked with bundles for a week, I tried going back to working on milestone features for 0.8.0. I helped with polishing up Alex’s work on PvP from last month to get it to testable state, and then I got side tracked again. November was truly a month of distractions for me.
On a whim I looked into running the server locally on Steam Deck and the upcoming Steam Machine, and I got just a little bit carried away.
While it is easy to just run the client on Linux under Proton and connect to a remote server thanks to the excellent work done by TobiX, running the server locally as well was a bit of pain on SteamOS in particular. Because SteamOS is immutable, you cannot install system packages out of the box, and if you disable this restriction, the system packages you install will be overwritten by system updates, which makes doing the full server setup with the .NET runtime and a reverse proxy more complicated. Some streamlining was in order.
One thing that had been on my mind for a long time was getting rid of a reverse proxy entirely. Internal client builds actually allow authentication over arbitrary ports, but all shipping clients are hardcoded to use port 443, which is the port used for HTTPS connections. The reason for this is very simple: your email and password are sent to the authentication server as plain text, so without encryption provided by HTTPS they can be intercepted by a third party. To avoid the unnecessary headache of properly implementing HTTPS and for extra security in general, our authentication server listens for requests on port 8080 on localhost using regular HTTP, and all the encryption is handled by a reverse proxy, usually Apache. However, when connecting to a local server running on the same machine, you do not really need any encryption.
As an alternative to using a reverse proxy, I made a client executable patch that changes the hardcoded authentication port from 443 to 8080. This patch is available both through our MHPatcher tool, as well as via a new web patcher (thanks again to TobiX for the idea). With this patch you can get rid of the reverse proxy entirely, and just connect to the authentication server directly. Thanks to our recently implemented web dashboard, you can serve the SiteConfig.xml file directly from MHServerEmu as well.
The requirement to install the .NET runtime could also be made optional. We now have self-contained nightly Linux builds of the server that have the runtime built-in.
With the reverse proxy and the runtime taken out of the equation, we no longer have any external dependencies that would potentially require tinkering with the mutability of the operating system. The next thing I wanted to do was make the server easier to run in the Game / Big Picture mode. My first approach was to run the server along with the client in the same Proton prefix, but this made things break in all kinds of unexpected ways. Rather than try to resolve all the issues one by one, I decided to approach this from a different angle and focus on adding the Linux version of the server to Steam as a separate non-Steam game. This worked a lot better, and the only adjustment that was really required was changing the listen address for the web frontend from localhost to 127.0.0.1 for it to be accessible under Wine.
It worked, but it was very inconvenient to configure the server and issue commands to it. I ended up getting even more side tracked and looking into options for making a graphical user interface (GUI) that would be usable in the Game / Big Picture mode. I threw together a couple of prototypes and settled on using the Avalonia framework to make a touch screen friendly GUI with native Linux support using AOT compilation. Here is what it looks like so far:
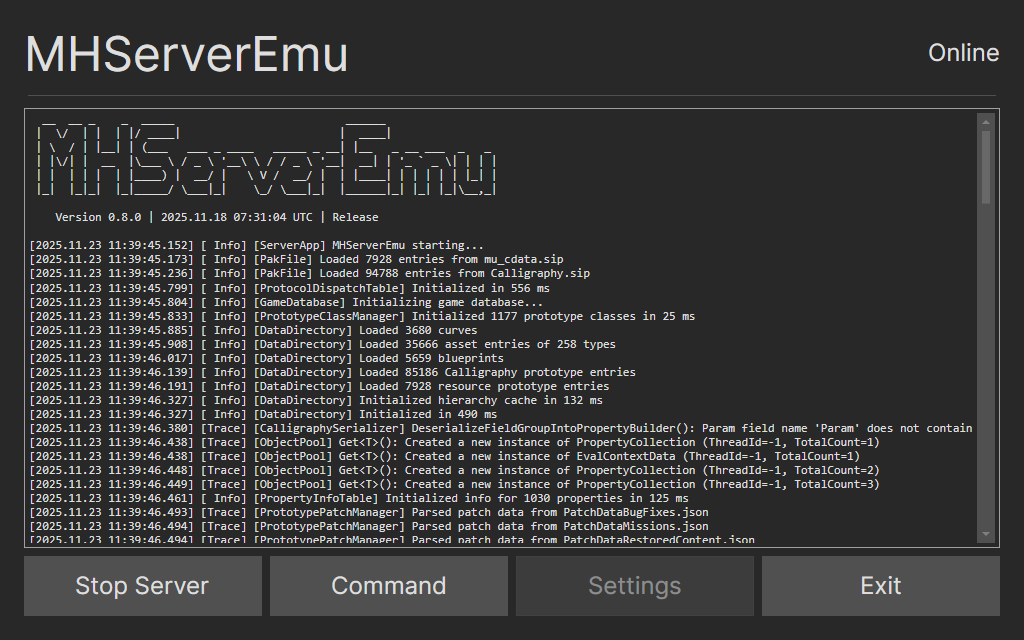
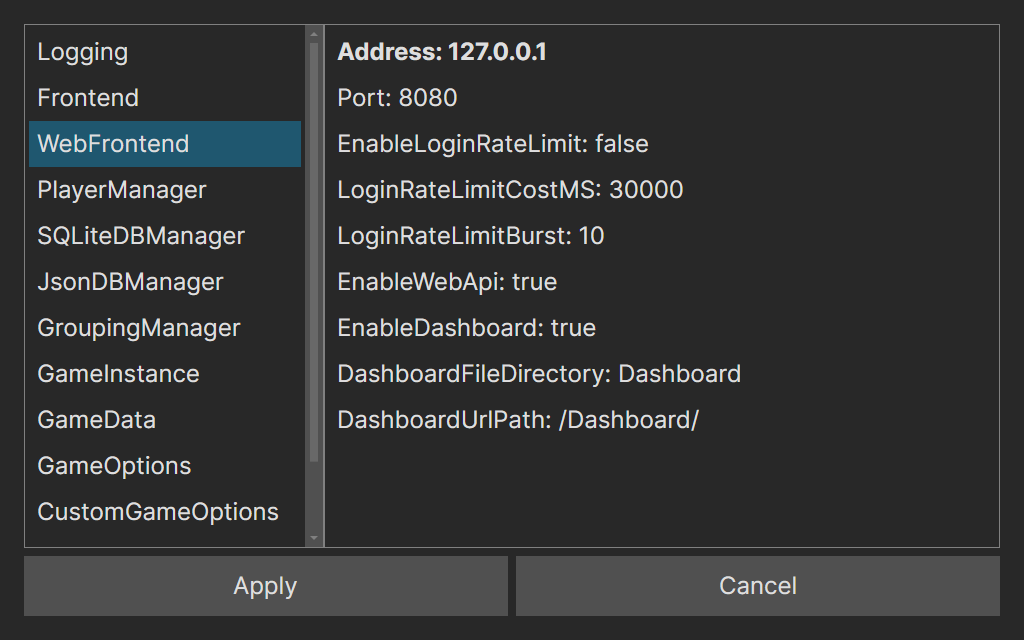
The initial release of this Avalonia-based GUI is now available on GitHub. Although it was designed with Steam Deck in mind, there is a Windows build too that works pretty well. Right now it supports the basic functionality, like running the server, invoking commands, and changing server configuration settings. I have many ideas for potential improvements, but they will have to wait until I get back on track with the 0.8.0 milestone for the main server project.
Bifrost
One last thing. I was pleasantly surprised with how smoothly the development of the server GUI went with Avalonia, and also with how great the startup performance was when using AOT compilation. I decided to look into porting our client launcher, Bifrost, to Avalonia as well. This is still ways off, but I did some initial work on this.
One thing I want to do in the next major release of Bifrost is improve the looks of the main window, and redoing the GUI in Avalonia is a great opportunity for this. For this I made a prototype that recreates the general look of the Gazillion launcher used in 2013-2015:

There are numerous other ideas I have for Bifrost, and I want the next release to be ready before MHServerEmu 1.0 is out early next year. However, finishing up the server has the priority for now, so the work on Bifrost may need to be pushed back further.
Well then, back to work for me. Until next time!