MHServerEmu Progress Report: October 2024

Time for the spookiest MHServerEmu Progress Report of the year.
Loot Continued
With most of the obvious low-hanging fruit features taken care of, this month it was time for me to work on a more time-consuming aspect of the game. After discussing this with Alex and some of the community members on our Discord server, I decided to continue iterating on our loot system implementation.
At the start of the month we had loot tables rolling, items dropping, and affixes being picked, but the game’s loot system is much broader than just items. In total there are 12 loot types:
-
Item - should be self-explanatory.
-
Agent - health, mana, and experience orbs, as well as boons.
-
Credits - legacy loot type from before currencies were implemented, credit piles are represented by agent entities (more on that later).
-
Experience - mission experience rewards.
-
Power Points - extra power points (pre-BUE missions only).
-
Health Bonus - max health bonuses (pre-BUE missions only).
-
Endurance Bonus - max primary resource (spirit, etc.) bonuses (pre-BUE missions only).
-
Real Money - special drop type used only for the Vibranium Ticket promotion in 2015.
-
Callback Nodes - actions that need to happen when loot is distributed, such as displaying a banner message.
-
Vanity Title - title unlocks.
-
Vendor XP - experience for leveling up vendors (this is also how Genosha influence rewards are implemented).
-
Currency - any non-credits currency that can be represented by either an item or an agent.
Loot can awarded through two types of loot actions: spawning and giving. Spawning creates loot represented in the game world by items and agents for players to pick up, while giving adds everything straight to players’ inventories. Only items, agents, credits, and currency can exist in the game world, everything else goes directly to players, even if the spawn loot action is requested.
Loot that needs to be clicked on to be picked up is represented by the Item entity class, while things that get picked automatically when you run over them exist as Agent entity instances. Here is a chart that shows how loot types relate to entity types that represent them:
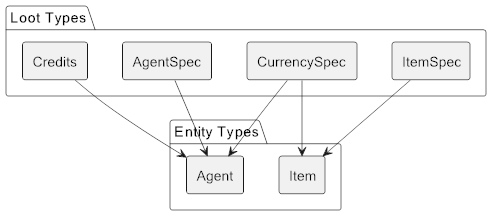
Note that item and agent loot types are different from Item and Agent entity types. When loot tables are rolled, and an item or an agent drop node is encountered, the game checks if the entity prototype specified in the node has an ItemCurrency property defined. If it does, the drop gets designated as a currency loot type, rather than the loot type corresponding its underlying entity type. To add even more confusion to the mix, credits are their own drop type, and they are always represented by Agent entities. And because things were not hectic enough, Agent entities representing currencies are referred to as currency items in the game data.
With all of that figured out, we now had non-item drops spawning. The next thing to do was implementing pickups for orb (agent) drops when you run over them.
The obvious approach would have been to use the physics system to detect when avatars overlap with orbs, and do the pickup interaction in the handler for this event. There was a problem though: most orb entities do not have a collision shape defined, meaning they are not capable of overlapping with other world entities. The correct way to do it was to implement the ProceduralProfileOrbPrototype and do the pickup interaction within the Think() method. Orbs actually have the AICustomThinkRateMS property, allowing them to “think” and check distances to potential receipients on every frame, making this interaction more responsive than it would have been with default AI settings.
Here is what the current implementation of Think() for orbs looks like:
public override void Think(AIController ownerController)
{
    ProceduralAI proceduralAI = ownerController.Brain;
    if (proceduralAI == null) return;
    Agent agent = ownerController.Owner;
    if (agent == null) return;
    Game game = agent.Game;
    if (game == null) return;

    // Destroy this orb if it has finished shrinking
    if (ShrinkageDurationMS > 0)
    {
        TimeSpan shrinkageEndTime = agent.Properties[PropertyEnum.AICustomTimeVal1]
            + TimeSpan.FromMilliseconds(ShrinkageDelayMS)
            + TimeSpan.FromMilliseconds(ShrinkageDurationMS);

        if (game.CurrentTime >= shrinkageEndTime)
        {
            agent.Kill(null, KillFlags.NoDeadEvent | KillFlags.NoExp | KillFlags.NoLoot);
            return;
        }
    }

    // Find an avatar that can potentially pick this orb up
    Avatar avatar = null;

    ulong restrictedToPlayerGuid = agent.Properties[PropertyEnum.RestrictedToPlayerGuid];
    if (restrictedToPlayerGuid != 0)
    {
        Player player = game.EntityManager.GetEntityByDbGuid<Player>(restrictedToPlayerGuid);
        // Get current avatar for the player we are looking for
        if (player?.CurrentAvatar?.IsInWorld == true)
            avatar = player.CurrentAvatar;
    }

    // If we found an avatar, check if it can pick this orb up
    if (avatar != null)
    {
        Vector3 agentPosition = agent.RegionLocation.Position;
        Vector3 avatarPosition = avatar.RegionLocation.Position;

        if (Vector3.DistanceSquared2D(agentPosition, avatarPosition) < _orbRadiusSquared && TryGetPickedUp(agent, avatar))
            return;
    }
}
The actual pickup interaction happens within TryGetPickedUp(): this includes applying orb effects, such as adding currency, awarding XP, and activating powers (restoring health/spirit, applying boon buffs, etc.). There is still some additional AI behavior left to implement: health and spirit orbs are supposed to be able to follow avatars that get close enough to them, and some orbs need to be non-instanced and available for all players to pick up. This is something we will be iterating on in the future.
With more varied loot being able to drop and be picked up, it was now time to expand the range of available loot drop event types. Everything so far has been using the four events associated with defeating enemies: OnKilled, OnKilledChampion, OnKilledElite, and OnKilledMiniBoss. However, for treasure chests it was necessary to implement a separate event type called OnInteractedWith, which was not possible to trigger without a more in-depth interaction system.
I did not have to go through the trouble of overhauling the entire interaction system: as part of his work on missions, Alex had already done most of the work needed. However, missions are a huge all-encompassing system, and merging the development branch would have been too disruptive at this stage. So instead I went through it and manually ported just the parts that could work on their own, including the new interaction system. There were a few small crashes as a result of this porting process, but they were very quickly dealt with, and implementing treasure chest loot was as easy as adding some function calls in the right place. I also had to do a bit of refactoring to isolate some code from OnKilled event handlers that could be shared with OnInteractedWith. With that taken care of, we now have a much more satifying treasure room experience.
The next thing to do became obvious as soon as currency items started dropping: without cooldowns, entire screens were covered with Eternity Splinters, which was obviously not how it was supposed to work. Work on this is still ongoing at the time of writing this, but the iconic six-minute Eternity Splinter timer is now working in nightly builds as it should.
This is just one type of loot cooldowns though. As with almost everything in this game, there are many almost conflicting systems that were piled up on top of one another. For instance, some loot cooldowns can be tied to specific entities rather than drops, like terminal bosses you would get Cube Shards from. Other cooldowns are rollover-based, meaning your loot is gated by specific daily or weekly reset times rather than amount of time since your last drop. Untangling all of this is going to take some time, which is what I am going to be continuing to work on next month.
Let’s Get Dangerous
Alex has some details to share on what he has been working on in October.
Hello everyone, this is AlexBond. In this report I would like to overwhelm you with code talk about how the SpawnMap class works, how Legendary Missions are rolled, and how I got into the Danger Room.
SpawnMap
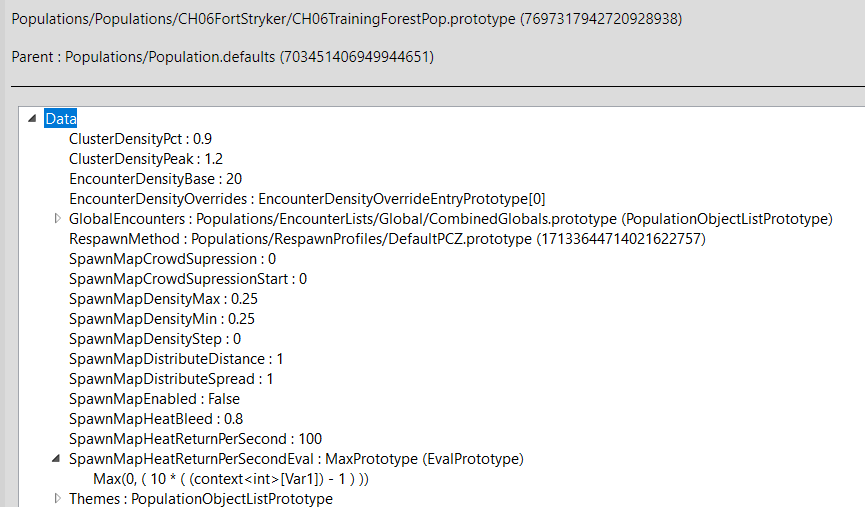
AreaPrototype contains various population parameters, and some of them have a SpawnMap prefix. We used to ignore them, but now we took advantage of them to implement an additional spawning system.
A SpawnMap (also referred to as a HeatMap) is like a bitmap image with a resolution of 256x256, in which each “pixel” represents a byte of information of type HeatData. The contained “heat” is transferred to clusters of mobs for spawning.
When we initialize this class, we iterate over all coordinates within our area to determine walkable sections using the navi system.
for (int y = 0; y < _boundsY; y++)
{
    for (int x = 0; x < _boundsX; x++)
    {
        Vector3 position = center + new Vector3(Resolution * x, Resolution * y, 0.0f);
        if (navi.Contains(position, spawnRadius, new WalkPathFlagsCheck()))
        {
            _heatMap[index] = HeatData.Min;
            _spawnZone++;
        }
        index++;
    }
}
Using the spawnZone parameter, we calculate the heat density of the population that is going to be spawned. This density is then applied to our SpawnMap instance.
// Add heat to HeatMap
_pool = 0;
for (index = 0; index < _heatMap.Length; index++)
{
    HeatData heatData = _heatMap[index];
    if (HasFlags(heatData)) continue;

    int heat = GetHeat(heatData);
    if (heat + _heatBase < (int)HeatData.Max)
        _heatMap[index] = (HeatData)(heat + _heatBase);
    else
        _pool += _heatBase;
}
The surplus heat is transferred to a pool, and at intervals defined by the SpawnMapPoolTickMS parameter we attempt to bring back the heat from the pool to the map.
Because SpawnMap instances update every time a player moves, they require some additional optimizations. To reduce server load, only areas around players defined by SpawnGimbal instances are populated.
A SpawnGimbal is a sort of shifting area that has already been checked, in which a player is located. This system allows us to significantly reduce server load for processing areas that have already been populated.
public void UpdateSpawnMap(Vector3 position)
{
    Region region = GetRegion();
    if (region == null || _spawnGimbal == null) return;
    if (_spawnGimbal.ProjectGimbalPosition(region.Aabb, position, out Point2 coord) == false) return;
    if (_spawnGimbal.Coord == coord) return;

    bool inGimbal = _spawnGimbal.InGimbal(coord);
    _spawnGimbal.UpdateGimbal(coord);
    if (inGimbal) return;

    Aabb volume = _spawnGimbal.HorizonVolume(position);
    foreach (var area in region.IterateAreas(volume))
    {
        if (area.SpawnMap != null)
            area.PopulationArea?.UpdateSpawnMap(position);
    }
}
There is a trade-off though: when a player moves at high speed, groups of enemies can spawn right at their position, but this behavior is accurate to the original game. The reason for these delays is that spawning takes at least 500 ms, which is not enough for enemies to spawn ahead of time. We can reduce this number, but then it would take longer to wait a spawn to happen.
When UpdateHeatMap() is called, the related population is spawned in “hot spots”. These spots are projected to the HeatMap, and the heat is subtracted from those points, along with neighboring points within a certain radius. This frees up space for a group of mobs represented by a ClusterObject, and allows us to spread the population evenly.
Clusters may contain special BlackOutZone objects that prevent spawning from happening. We take these objects into account by transferring heat from their locations into the common pool.
int index = 0;
int spawnZone = 0;
for (int y = 0; y < _boundsY; y++)
{
    for (int x = 0; x < _boundsX; x++)
    {
        _heatMap[index] &= ~HeatData.BlackOut;

        Vector3 position = center + new Vector3(Resolution * x, Resolution * y, 0.0f);
        foreach (BlackOutZone zone in zones)
        {
            float radiusSq = MathHelper.Square(zone.Sphere.Radius);
            float distanceSq = Vector3.DistanceSquared2D(position, zone.Sphere.Center);
            if (distanceSq < radiusSq)
            {
                int heat = GetHeat(_heatMap[index]);
                _heatMap[index] = (_heatMap[index] & HeatData.FlagMask) | HeatData.BlackOut;
                PoolHeat(heat);
            }
        }

        if (HasFlags(_heatMap[index]) == false) spawnZone++;
        index++;
    }
}
When a group of enemies is fully destroyed, the heat they took is returned to the common pool. This gives regions an endless lifespan, which is crucial for public regions. This way newly arriving players will encounter a living world, rather than a wasteland from past battles. Ensuring this is the primary function of the SpawnMap class.
As you can see, there are numerous different systems for spawning: PopulationArea, RespawnDestructibles, MetaGame, Mission, SpawnMap, Spawner, and more. Here is a recap of what they are all for:
-
PopulationAreapopulates regions without using markers. -
RespawnDestructiblesallows props, such as cars and garbage cans, to be restored. -
MetaGamepopulates regions with timer-based events or waves. -
Missionspawns in response to event triggers. -
SpawnMapprevents regions from becoming barren wastelands. -
Spawnercan activate when a player enters its radius, or via some other kind of trigger.
In other words, dynamic spawning makes the game more alive. Now let’s take a look at legendary missions.
Legendary Missions
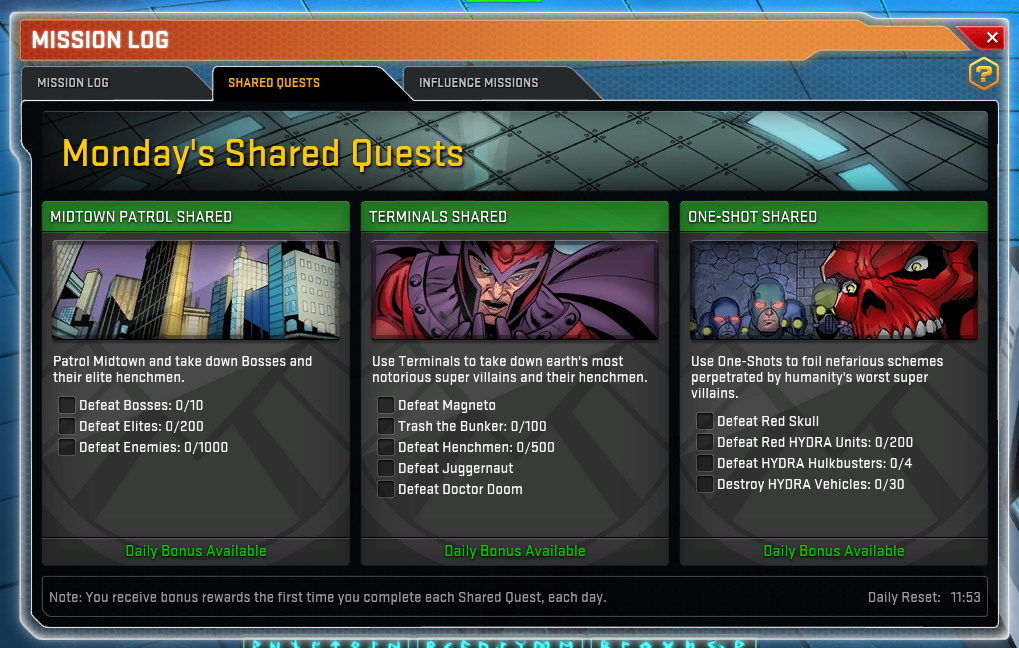
This game has a lot of activities: in addition to the story, region events, and terminal bounties, there are also Legendary Missions, Daily Missions, Shared Quests, Omega Missions, and Weekly Missions. So how does it all work?
When a player enters a region, their MissionManager runs InitializeForPlayer() and does a number of random picks.
First it picks categories through LegendaryMissionCategoryPicker, and then for each category it picks a random mission using PickLegendaryMissionForCategory(). At first it seems simple enough, but there is a catch.
For example, a mission was picked, and we don’t like it. What do we do in this case? That’s right, we reroll it with credits!
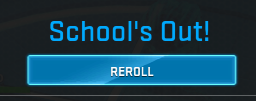
In this case the current mission must be added to a LegendaryMissionBlacklist, and we should receive a new one. This is also used when we complete a mission, so that we don’t get the same one multiple times in a row. But what happens when all missions get blacklisted? In this case we need a second round of picking.
This is what the code looks like. Confusing, isn’t it?
private PrototypeId PickLegendaryMission()
{
    PrototypeId pickedMissionRef = PrototypeId.Invalid;

    Picker<LegendaryMissionCategoryPrototype> picker = LegendaryMissionCategoryPicker();
    while (picker.PickRemove(out LegendaryMissionCategoryPrototype categoryProto))
    {
        List<PrototypeGuid> blacklist = null;
        if (categoryProto.BlacklistLength > 0)
        {
            PrototypeGuid guid = GameDatabase.GetPrototypeGuid(categoryProto.DataRef);
            _legendaryMissionBlacklist.TryGetValue(guid, out blacklist);
        }
        pickedMissionRef = PickLegendaryMissionForCategory(categoryProto, blacklist);
        if (pickedMissionRef != PrototypeId.Invalid) break;
    }

    if (pickedMissionRef == PrototypeId.Invalid)
    {
        picker = LegendaryMissionCategoryPicker();
        while (picker.PickRemove(LegendaryMissionCategoryPrototype var categoryProto))
        {
            pickedMissionRef = PickLegendaryMissionForCategory(categoryProto, null);
            if (pickedMissionRef != PrototypeId.Invalid) break;
        }
    }

    return pickedMissionRef;
}
When picking Legendary Missions, one thing that needs to be taken into account is its restriction defined using the EvalCanStart eval. It uses the same formula for all Legendary Missions that looks like this:
EvalCanStart = ( ( CharacterLevelProp > 19 ) && ( CharacterLevelProp < 61 ) )
This ensures that Legendary Missions are unavailable until level 20. However, the game designers did not define separate formulas for each mission, which is why I would get Legendary Missions for chapter 9 at level 20. I wanted to do them as I went through the story, so I had to spend all my credits on rerolling!
In addition to Legendary Missions there are also Daily Missions, and they use a different picking method.
First, the current CalendarDay is determined, and if it’s larger than the last recorded day, daily missions get rerolled.
int calendarDay = CalendarDay();
int lastDailyDay = Player.Properties[PropertyEnum.LastDailyMissionCalendarDay];
if (lastDailyDay < calendarDay)
{
    ResetDailyMissions(calendarDay, lastDailyDay);
    RollDailyMissions();
    Player.Properties[PropertyEnum.LastDailyMissionCalendarDay] = calendarDay;
}
As part of the reroll process, the current day of the week is determined, and missions for this day are activated.
The same happens for Advanced Missions, but with blacklists and two picking passes, similar to Legendary Missions.
But what happens if someone plays at night and waits for the daily reset at midnight? In this case we need a clock: events scheduled using ScheduleDailyMissionUpdate() check every second whether the current day ended, like a second hand on a clock.
With this taken care of, let’s move onto another fun activity.
Danger Room
The main difficulty with implementing the Danger Room mode is regenerating the same region with different input data.
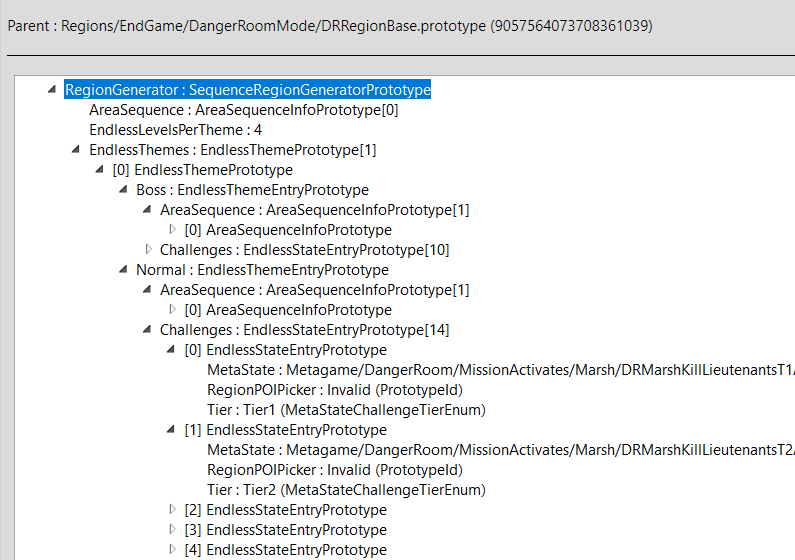
Here is what the insides of a generator prototype for such region look like:
The current mode is chosen based on the EndlessLevel parameter like this:
public EndlessThemeEntryPrototype GetEndlessGeneration(int randomSeed, int endlessLevel, int endlessLevelsTotal)
{
    if (EndlessThemes == null || endlessLevel <= 0 || endlessLevelsTotal <= 0) return null;

    int totalThemes = EndlessThemes.Length;
    int randomIndex = randomSeed % totalThemes;
    int endlessOffset = (endlessLevel - 1) / endlessLevelsTotal;
    int selectedIndex = (randomIndex + endlessOffset) % totalThemes;

    EndlessThemePrototype EndlessTheme = EndlessThemes[selectedIndex];
    int levelInTheme = endlessLevel % endlessLevelsTotal;

    if (levelInTheme == 0)
        return EndlessTheme.TreasureRoom;
    else if (levelInTheme == endlessLevelsTotal - 1)
        return EndlessTheme.Boss;
    else
        return EndlessTheme.Normal;
}
For the initial region EndlessLevel = 1, so this function will return the Normal mode.
Next, in the Normal mode a random Entry is picked from Challenges, and a mission approprite for our difficulty Tier is started.
The transfer of all of these settings and affixes from a DangerRoomScenario item to a region goes through the following sequence:
DangerRoomScenario–Transition–RegionContext–RegionSettings–Region
When the first EndlessLevel is cleared, it is incremented by one, and the settings sequence looks like this:
OldRegion-RegionContext-RegionSettings-Region
All of these settings make the region transfer more complex. But there is more.
When a Danger Room mission is cleared, the client needs to receive an invitation to move to the next level. It looks like this:
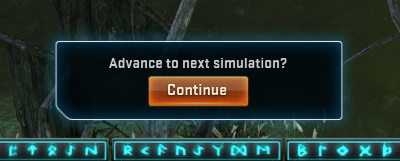
Implementing it was not easy at all. To create this dialog, we needed to implement a lot of classes, and the result is almost as complex as CreateDialogA in the Windows API:
private void CreateDialog(ulong playerGuid, DialogPrototype dialogProto)
{
    if (_dialogs.TryGetValue(playerGuid, out GameDialogInstance dialog) == false)
    {
        dialog = Game.GameDialogManager.CreateInstance(playerGuid);
        dialog.OnResponse = _onResponseAction;
        dialog.Message.LocaleString = dialogProto.Text;
        dialog.Options = DialogOptionEnum.ScreenBottom;

        if (dialogProto.Button1 != LocaleStringId.Blank)
            dialog.AddButton(GameDialogResultEnum.eGDR_Option1, dialogProto.Button1, dialogProto.Button1Style);

        if (dialogProto.Button2 != LocaleStringId.Blank)
            dialog.AddButton(GameDialogResultEnum.eGDR_Option2, dialogProto.Button2, dialogProto.Button2Style);

        _dialogs.Add(playerGuid, dialog);
    }

    if (dialog != null)
        Game.GameDialogManager.ShowDialog(dialog);
}
Here is how it works: finishing a mission initiates MetaStateShutdown and creates a dialog that is relayed to the client through NetMessagePostDialogToClient. The player presses the dialog button, and the client responds with NetMessageDialogResult that triggers the OnDialogResult() event on the server. OnDialogResult() calls MetaStateShutdown.OnResponse() that teleports the player to the next EndlessLevel region.
As you can see, a simple button has a not-so-simple implementation. And there is also a case for when there are multiple players in a party, and each one has to confirm for a teleport to happen.

To get the mode to a feature-complete state we still have timer widgets to implement with three MetaStateScoringEventTimer states: Start, Stop, and End. However, even at this stage Danger Room regions can be completed without any significant issues.
Now you should have a better idea about what I have been working on this month. There is still a lot more work to do, see you in future reports!
That’s all we have for you today. See you next month!
